So I created a little panel generator (for the Native integration) based on the number of knobs, leds, and jack inputs and outputs. It takes a number of assets and spreads them around so they fit the maximum height and adjust the panel width accordingly.
Right now I’m testing with the NativeExample assets. I’m using Python, with Pillow library, and I can easily export a full composite png using the exact same assets and coordinates:

However when I create my elements.cpp with these same coordinates the final render was way off:
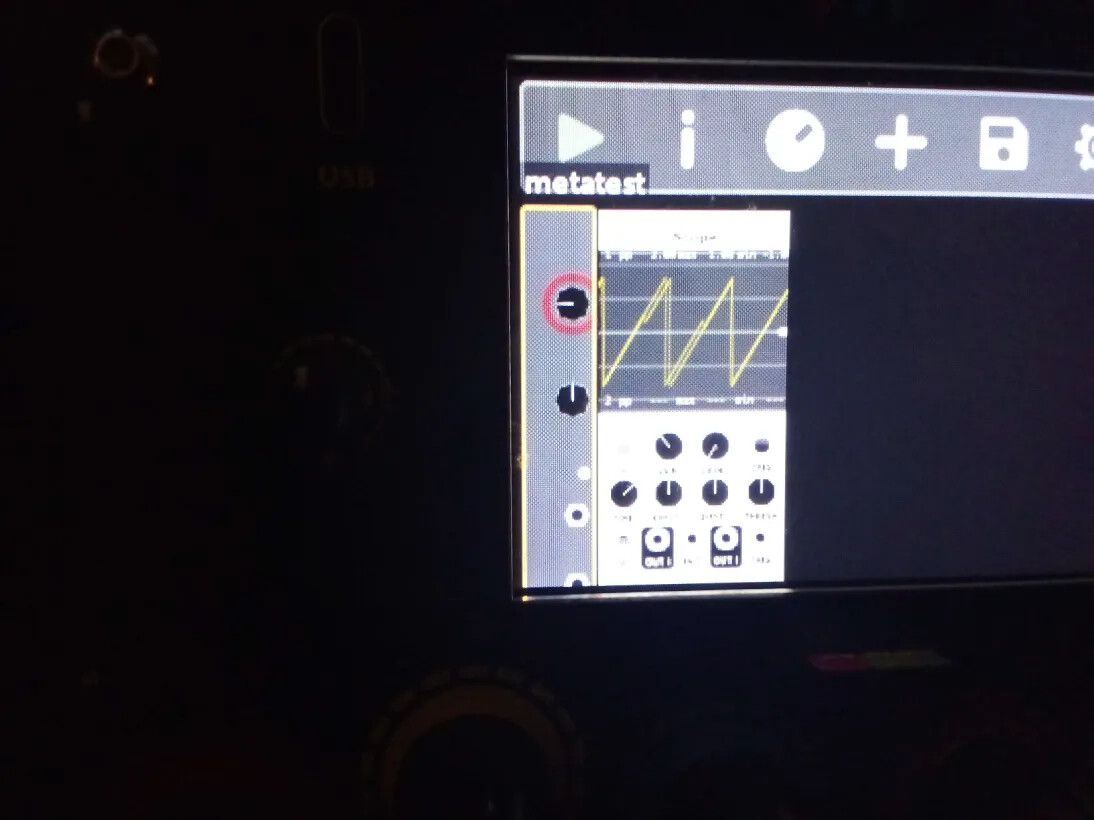
I first tried explicitly setting .coords = MetaModule::Coords::TopLeft; on all of the objects, but this didn’t change anything (and wouldn’t explain the huge jump on the Y axis).
Then I tried dividing the coordinates in half and that actually resulted in a correct (or at least much better) placement:
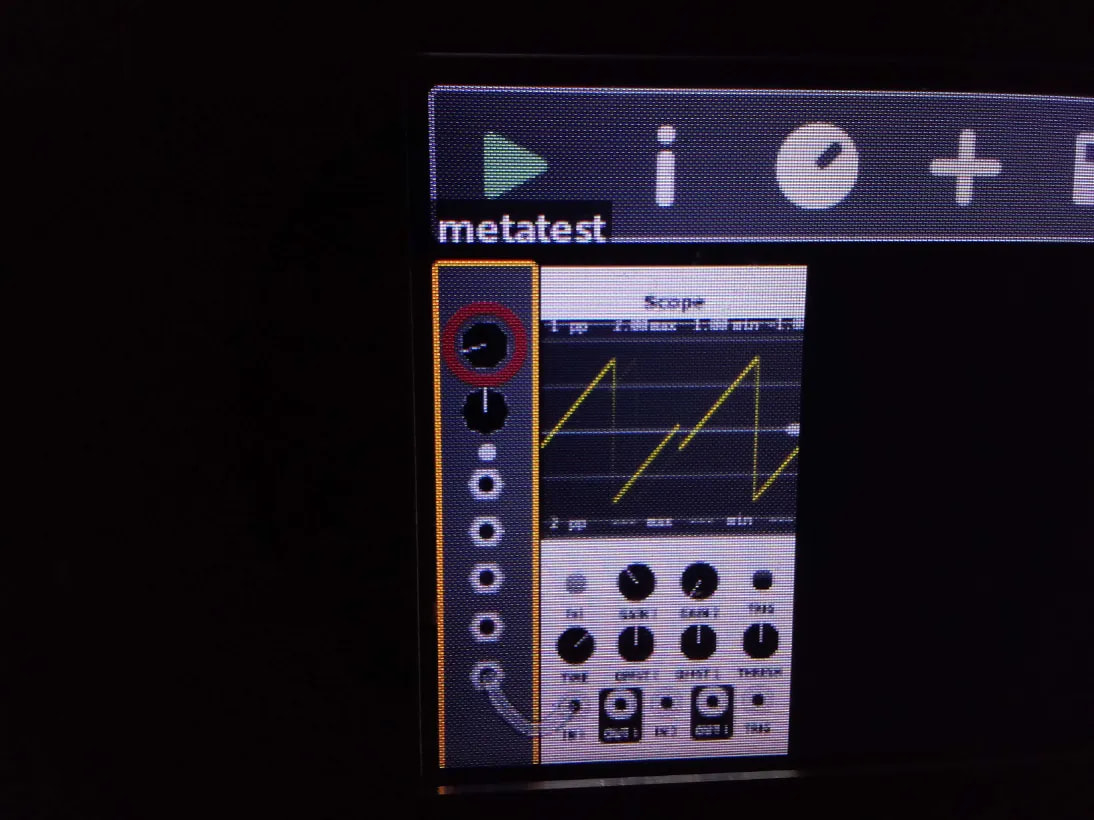
Am I missing some caveats to how asset placement/coordinates work?
Here is my full elements.cpp :
#include "CoreModules/CoreProcessor.hh"
#include "CoreModules/elements/element_counter.hh"
#include "CoreModules/elements/elements.hh"
#include "CoreModules/elements/element_info.hh"
#include "CoreModules/register_module.hh"
#include "HeavyMetaModule_metatest.hpp"


void init_metatest() {
  static std::array<MetaModule::Element, 8> elements;
  static std::array<ElementCount::Indices, 8> indices;


  MetaModule::Knob freq;
  freq.x_mm = 10;
  freq.y_mm = 25;
  freq.coords = MetaModule::Coords::TopLeft;
  freq.image = "metatest/components/knob.png";
  freq.short_name = "freq";
  elements[0] = freq;
  indices[0] = {.param_idx = FreqID};

  MetaModule::Knob vol;
  vol.x_mm = 10;
  vol.y_mm = 58;
  vol.coords = MetaModule::Coords::TopLeft;
  vol.image = "metatest/components/knob.png";
  vol.short_name = "vol";
  elements[1] = vol;
  indices[1] = {.param_idx = VolID};

  MetaModule::JackInput injack0;
  injack0.x_mm = 13;
  injack0.y_mm = 100;
  injack0.coords = MetaModule::Coords::TopLeft;
  injack0.image = "metatest/components/jack.png";
  injack0.short_name = "Input 0";
  elements[2] = injack0;
  indices[2] = {.input_idx = InputID0};

  MetaModule::JackInput injack1;
  injack1.x_mm = 13;
  injack1.y_mm = 124;
  injack1.coords = MetaModule::Coords::TopLeft;
  injack1.image = "metatest/components/jack.png";
  injack1.short_name = "Input 1";
  elements[3] = injack1;
  indices[3] = {.input_idx = InputID1};

  MetaModule::JackOutput outjack0;
  outjack0.x_mm = 13;
  outjack0.y_mm = 148;
  outjack0.coords = MetaModule::Coords::TopLeft;
  outjack0.image = "metatest/components/jack.png";
  outjack0.short_name = "Output 0";
  elements[4] = outjack0;
  indices[4] = {.output_idx = OutputID0};

  MetaModule::JackOutput outjack1;
  outjack1.x_mm = 13;
  outjack1.y_mm = 174;
  outjack1.coords = MetaModule::Coords::TopLeft;
  outjack1.image = "metatest/components/jack.png";
  outjack1.short_name = "Output 1";
  elements[5] = outjack1;
  indices[5] = {.output_idx = OutputID1};

  MetaModule::JackOutput outjack2;
  outjack2.x_mm = 13;
  outjack2.y_mm = 200;
  outjack2.coords = MetaModule::Coords::TopLeft;
  outjack2.image = "metatest/components/jack.png";
  outjack2.short_name = "Output 2";
  elements[6] = outjack2;
  indices[6] = {.output_idx = OutputID2};

  MetaModule::MonoLight ledvolled;
  ledvolled.x_mm = 18;
  ledvolled.y_mm = 87;
  ledvolled.coords = MetaModule::Coords::TopLeft;
  ledvolled.image = "metatest/components/led.png";
  ledvolled.short_name = "LED volled";
  elements[7] = ledvolled;
  indices[7] = {.light_idx = VolledID};


  MetaModule::ModuleInfoView info{
      .description = "Test plugin",
      .width_hp = 6,
      .elements = elements,
      .indices = indices,
  };

  MetaModule::register_module<metatestMM>("metatest", "metatest", info, "metatest/panel.png");
}
Dividing all of the x_mm/y_mm by 2 gave the correct placement.
